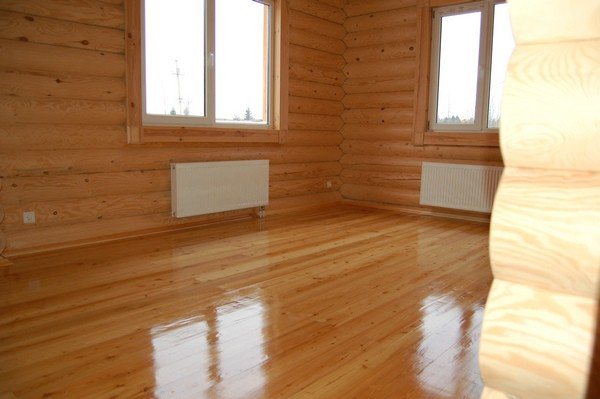
The quality of installing a wooden floor on logs depends on the correct formation of the base, the selection and processing of suitable materials, compliance with the instructions and the order of work. Successfully and tastefully made floor will delight owners with comfort and reliability.
Do-it-yourself installation of a wooden floor on logs
- 10.1 Video - Do-it-yourself installation of a wooden floor on logs
Installation benefits
Logs are wooden fragments of a thin elongated shape, which for construction purposes are replaced under the topcoat. Material advantages:
- thermal insulation, partial noise insulation;
- additional distribution of the load on the base;
- surface preparation for finishing screed;
- creation of a ventilated floor, in the thickness of which there is the possibility of placing communication systems.
- increased strength. The floor can withstand a load of up to 5 tons per 1 m;
- relatively simplified installation;
- the work will be inexpensive.
Logs can be laid on a base made of earth, it is advisable to make a cement screed before that, also on reinforced concrete or wooden floor slabs in multi-storey buildings.
Preparatory work
Before installation, you need to determine the area on which the film will be placed. It is impractical to lay infrared floors under cabinets and sofas. Therefore, you first need to designate the area into which it will need to be laid out. In the future, it will be possible to put light furniture on the floor - for example, a table, chairs, an armchair. The fact is that the power of the floor directly depends on the area that it occupies. When buying a material, the consultant must calculate the required power of the thermostat and the floor, depending on the area of the room.
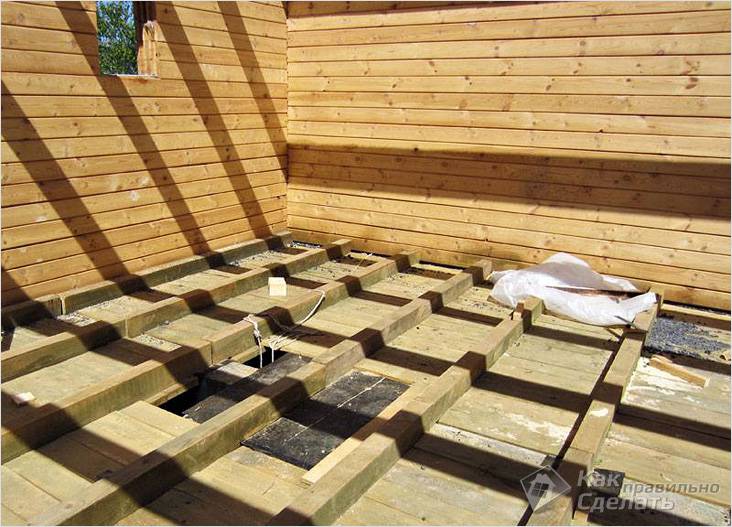
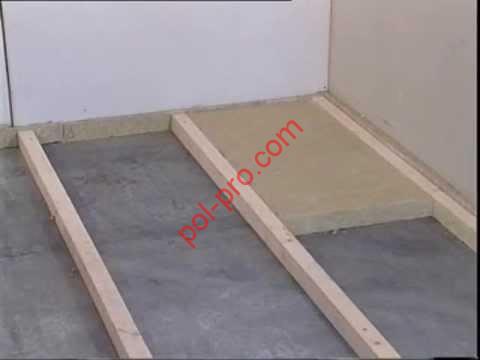
Lag device
Lag device
Wooden floors. Beams are rarely produced absolutely even, so it is difficult to achieve a strictly horizontal surface during lagging. For ease of installation, they can be attached to the beams from the side. When fixing the supports in this way, there is no need to use a special lining that regulates the height of the log. The lags are fixed with incomplete screws with a length exceeding the cross-section of the bars by more than 2-2.5 times, and with a diameter of 6 mm.
To prevent chips from forming on the wood during installation work, you need to drill holes in the attachment points, which are 2-3 mm smaller in size than the width of the screws. If the boards need to be located at a considerable distance, then the logs should be laid perpendicular to them and with a small step. The finishing coat should be made of thick planks.
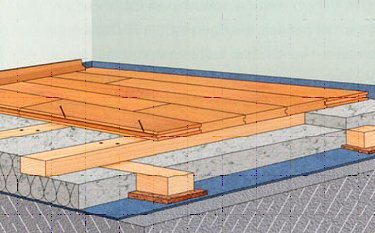
Concrete floors. To lay logs on concrete floors, you need to know the design features of the floor mounted in this way.
To exclude dampness of the floor, you need to make a full waterproofing. At the next stage, the insulation is laid, and, if necessary, the soundproofing material. The insulation layers are terminated with a floating cement screed.
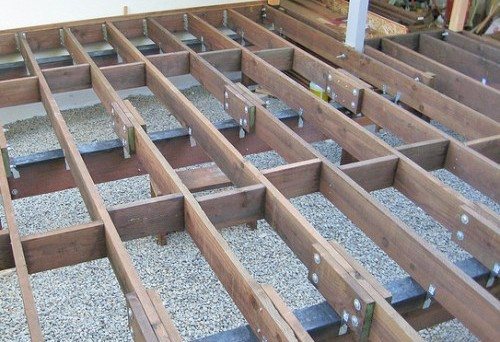
On top of the concrete floor, logs are placed, which serve as the basis for the final floor covering. The boards should be more than 2 m long. If the logs are shorter than required to completely cover the base, they must be joined with their ends. When connecting the lags, you need to pay attention so that the location of adjacent joints differs from the joints of neighboring bars by at least 50 cm.
If the screed is not done, waterproofing is still necessary.Logs should not be placed on an unstable insulation, since an unreliable base will contribute to their constant movement, which over time will contribute to the destruction of the finishing finish.
Analysis of the nuances of installing a water floor
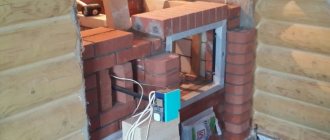
The installation of a water underfloor heating system begins with the installation of a manifold cabinet and the installation of a pump-mixing unit with a manifold block. The unit ensures that the set temperature level is maintained depending on the user's preferences.
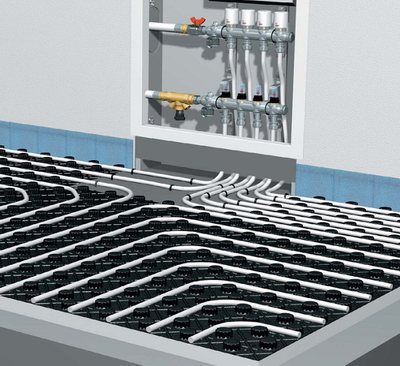
The manifold block is responsible for distributing the coolant to individual loops or underfloor heating circuits. The assembled structure is fixed in a manifold cabinet
Further, the order of work is carried out according to the following algorithm:
- They begin to prepare the floor, freeing it from debris and checking the levelness of the surface using a construction water level.
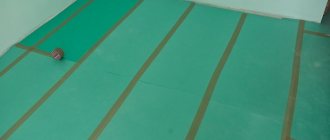
- A damper tape is laid around the perimeter of the room, which will reduce the amount of heat loss through the walls.
- Then a layer of vapor barrier material is laid to protect the system from moisture from below.
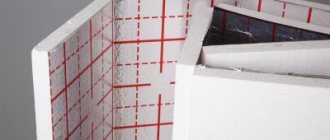
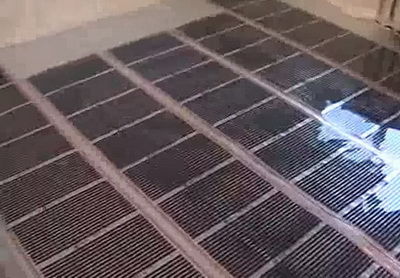
- At the next stage, the polystyrene foam plates are laid out, which provide thermal insulation and serve as the basis for fast pipe laying. The slabs are overlapped; for this, grooves are provided in their design.
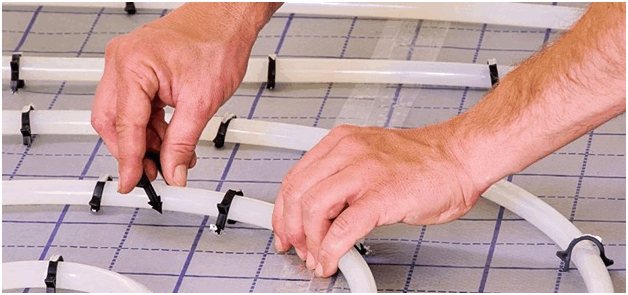
- After that, they start laying metal-plastic pipes according to the "snake" or "snail" scheme, distributing them between the bosses and maintaining the distance provided by the project. The power and intensity of heating depends on this. For better fixing of the pipe bend, use a special spring jig.
- After completing the design of the contours, the ends of the pipes are connected to the distribution manifolds, servos are installed, which allow you to regulate the operation of the warm floor using a room thermostat. Servomotors and room thermostats are connected to communicators.
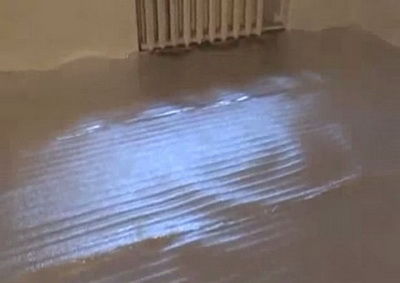
- After the completion of the work, the system is checked for leaks and the concrete screed is poured. The system can be operated after 28 days.
It is very important to choose the right floor covering for your home. We suggest that you figure out in detail what can and cannot be put on water pipes or infrared film, and what are the consequences of this:.
Choice of wood
Choice of wood
For the lag, a rectangular section of the bar is used. The height should be two to one and a half times the width. This type of cross-section provides maximum ability to withstand heavy loads.
- The most reliable material is oak. It is possible to perform flooring not only in a residential area, but also in a production facility.
- Siberian larch does not differ in strength from oak, but it has an important feature - not susceptible to decay. Thanks to the resins it contains, you can lay a wooden floor with this material even in a sauna. Larch is more expensive, so it is used less often.
- Logs can be selected from inexpensive woods such as pine, fir or spruce.
- Alder and aspen wood has a positive effect on health, therefore it is recommended to use it in a nursery.
Floor boards can be made from inexpensive wood species only in those rooms where the floor will not have to withstand regular, constant loads, since the wood is quite soft. Traces of any mechanical damage may remain on such a tree.
The type of wood must be selected taking into account the floor covering and its purpose.
- The highest grade is purchased when it is planned to leave the natural-looking floor covering.
- For lacquer coatings, it is desirable to purchase a first grade material.
- When painting, you can give preference to wood of the second grade.
To create reliable floors, it is usually enough wood of 2 or 3 grades with an approximate moisture content of 20%.
The optimum moisture content of wood is about 12-14%.If it is more, it is necessary to additionally dry the material, too high humidity can cause cracking.
The boards must be free from defects, so it is advisable to inspect the goods before purchasing.
To avoid a shortage of material, you need to buy 10-15% more material than it is supposedly required.
So that the tree does not succumb to mold, is not susceptible to bugs, fungus, you need to treat the entire tree that will be under the floor with an antiseptic composition. Boards on the underside require two processing times. The composition is applied at intervals of 3-5 hours. It is recommended to purchase water-soluble products, since a brush or spray device is sufficient to apply them.
The most famous wood preservatives are sodium fluoride, sodium fluorosilicate, ammonium fluorosilicate.
First start-up and pressure testing of the heating system water underfloor heating
At the end of the installation, before laying the screed or forming the floor covering, the functionality of the underfloor heating is checked in operating mode. To do this, you must run the entire system in test mode. The task of such a start-up is to check the operability of all elements of the heating system. As a result of the start-up, the intensity of the circulation of the coolant along the water circuit is determined, how the floor surface is heated, there are either flaws and malfunctions in the operation of the heating equipment.
On a note: having filled the system with a coolant, it is not necessary to drain it before laying the screed. The solution is placed on the filled pipes so that the water circuit takes on its optimal working dimensions.
In practice, three methods are used to test the performance of a water floor. What they are, we will consider in more detail.
1. The assembled system is brought to the optimal temperature regime and kept in this form for several days.
2. It is possible to check the integrity of the system filled with cold heat carrier by increasing the pressure in the pipeline.
3. Pre-pressure testing of the entire heating system with air.
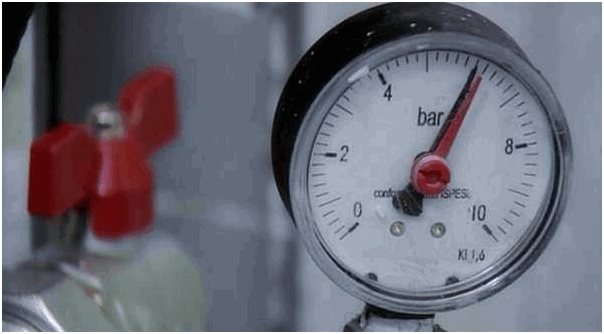
Important! To check (pressurize) the water circuit with air, a compressor is used that injects air into the pipeline at a pressure of up to 5 bar, no more. Otherwise, the integrity of the system at the connection points may be violated.
You choose the testing method yourself. It should be remembered that when checking the water circuit using high pressure air, the absence of a screed can negatively affect the integrity of the pipeline. Usually, in such cases, the pipes are pulled out of the mounting places, where the water circuit is fastened with ordinary mounting tapes and single fasteners.
To avoid such a situation, install beacons for the future screed, at a certain distance (step) and fix them with mortar. With such a frame, you can safely start blowing the heating circuit.
If the pipes were laid without loops and bends, you will not face such problems. Leaks in this case usually occur at the points where the circuit is connected to the collector.
System testing in various modes
The system connected to a heater or to a DHW source is brought to normal, operating temperature. At this moment, the water heated floor is adjusted in different temperature regimes. We start with a minimum, from 200C. Sequentially, within 2-4 hours, we raise the heating temperature by 50, and this is done throughout the entire time, reaching the optimal operating temperature of 35-450C. All this time, the state of the pipeline is being monitored. The joints and connection points are examined for leaks. After reaching the design capacity, the system is left in operation for a couple of days for final shrinkage.Only after no serious shortcomings have been identified, you can proceed to the filling of the screed or the installation of the floor structure.
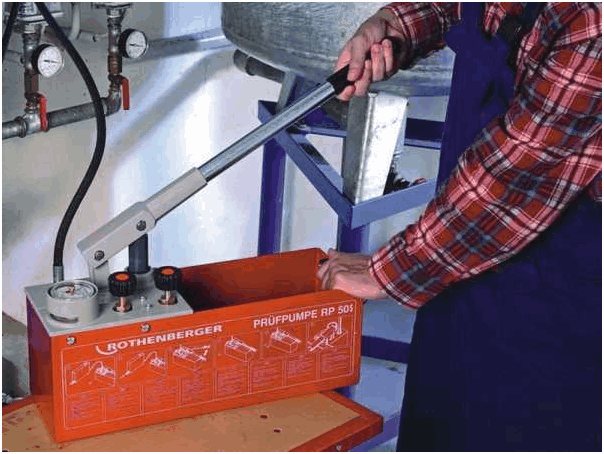
When checking the heating water circuit with excess pressure, the procedure is somewhat different. In a system filled with a cold coolant, a pressure of 1.5 to 2 times higher than the operating pressure is created. Leaving the system under pressure for a day, we identify the presence of shortcomings and malfunctions. If there are no leaks, you can proceed to the screed equipment.
The third option, which involves dry pressing, is rarely used. The compressor is connected to the inlet manifold and air is pumped into the system. One must be careful with the pressure parameters. It is not allowed to exceed the air pressure 2-3 times more than the working, design pressure. This method does not always give the desired effect, especially if antifreeze is supposed to be used.
On a note: antifreeze has increased fluidity, so it is best to check the system for integrity, having previously filled it with a coolant.
When using a pressure of more than 4 bar during the test run, keep the air vent valves closed.
For metal-plastic pipelines, at the first start-up, a cold coolant is usually used. In this case, the pressure can be raised to 6 bar.

When it comes to polypropylene pipes, the system must first be checked with ordinary water supplied under high pressure. The test pressure should be 2-3 times the normal working pressure. If after some time the system does not leak, you can return to normal mode by lowering the pressure to 1.5 bar.
On the video you can see in detail what devices and in what order the heating systems are pressurized.
Correct styling
Correct styling
- The surface on which the lag reinforcement needs to be done must be washed and carefully primed.
- Wooden beams and beams must be dried, then treated with an antiseptic compound.
- Sound insulation can be done using mineral insulation, foam or wood-based materials.
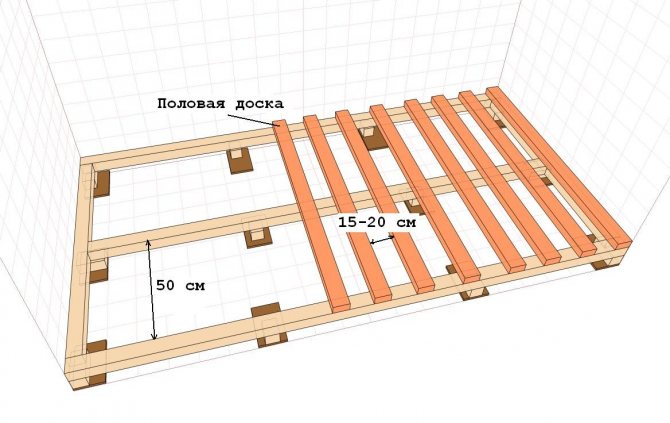
- It is not recommended to make the gaps between the lags more than 40-50 cm.
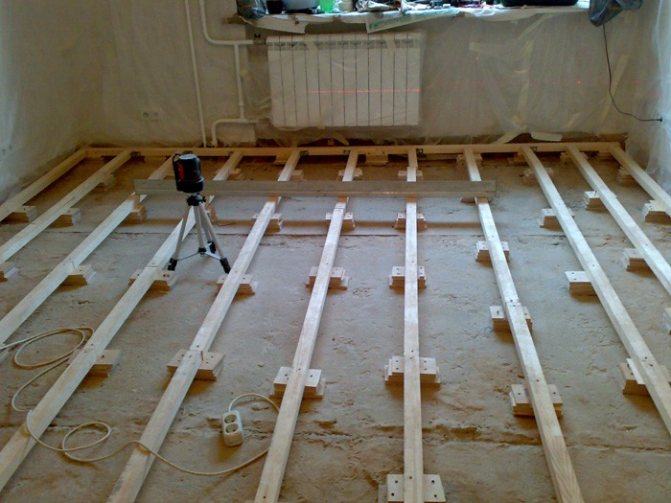
- The surface of the log is measured in accordance with the horizontal marks using a long level, which is located across the beams. If there are no gaps between the beams and the level, then the work was done correctly. In case of discrepancies, it is necessary to level the surface by changing the level of the substrate / anchors under a certain lag.
- Logs should be installed perpendicular to the larger side of the room. The finishing board is placed at a 90 ° angle to the joists. It is advisable to form the layout of materials so that the finishing coating is installed parallel to the sun's rays, that is, with the long side to the window.
Adjustable lags
Adjustable lags
Pre-threaded holes are made in the new design beams to simplify their installation. The lag can be adjusted by rotating the bolts, with the help of which the position of the beams changes quickly. When the level is adjusted, the rest of the bolts are cut off. Installation is pretty post:
- fasteners are screwed into the production recesses on the logs. Up to 5-6 fasteners will be required for 2.5 meters of the beam;
- the lag is laid out, at the same time the distance between them is measured and leveled;
- in the ceilings, recesses are formed for fastenings for adjustable lags - dowel-nails;
- the finishing coating is laid - wood boards.
Video - Adjustable lags
How the lags are attached
Floor lags
Lags are beams on which the clean finished floor material is attached. What should be these bars? It will depend on what's under the lags. The base can be various types of soil, concrete and wooden beams. The design is also influenced by whether a heater and a vapor barrier will be used.
Regardless of the base, the logs should always be treated with an antiseptic, that is, with a solution that protects against insect pests and decay.

Brick posts for fixing lags
If the installation of the lag will be carried out on the ground, then it is necessary to create concrete posts for fastening. To do this, holes are dug in the ground 50–60 cm deep, at a distance of 80 cm from each other. For convenience, marking can be done using a stretched fishing line or a nylon cord in places where logs will lie.
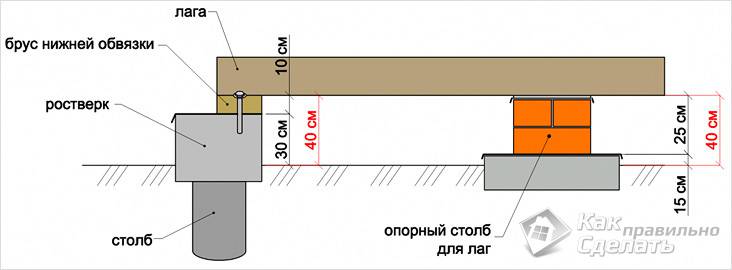
Installation diagram of support pillars
Here's how to make support pillars:
- At the bottom of the hole, which has a square appearance of 50 by 50 cm, a pillow of sand 10 cm thick is poured, and then 10 cm of crushed stone.
- Then wooden formwork is made of the required height, usually at least 20 cm above the ground level. If the soil is loose, it is better to additionally use reinforcement for strength.
- The finished formwork with recesses can be poured with concrete mortar with a ratio of cement, sand and gravel 1: 3: 5 or 1: 2: 4. After pouring the concrete into the upper part of the posts, before it sets, it is imperative to implant threaded studs for fastening the lag.
The reference top of the posts must be aligned with the horizontal line of the measuring level.
After the concrete has set, a layer of roofing material is placed on top of each column for waterproofing. After making sure that the studs are firmly frozen in the concrete, you can use them to secure the lags, which will be put on these studs through the holes made in advance. The diameter of the holes should be such that the studs go through it freely, but do not dangle. You also need to make a "pot" lag in the upper part for a nut with a washer. Then, nuts and washers can be screwed onto the logs put on the studs, while simultaneously pressing the logs to the upper plane of the posts.
Rough floor
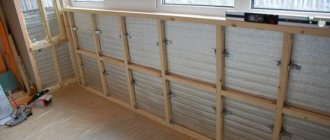
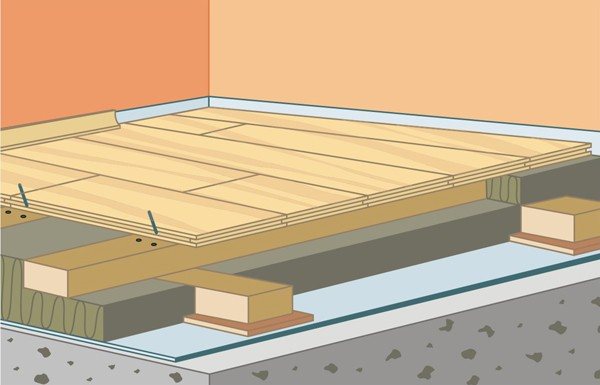
If it is necessary to make insulation and a vapor barrier, then a support bar is attached to the lower side of the log. A roughing board is mounted on it for laying the vapor barrier and insulation.
For the vapor barrier, you must use a special material, and not a simple film. It should be a diffuse membrane that removes accumulated condensate, or other similar building material.
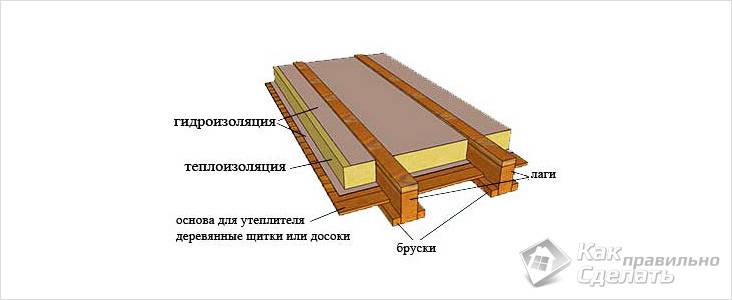
Floor insulation scheme by logs
Thermal insulation is placed on top of the vapor barrier. It can be mineral wool, basalt wool or something similar in property (building materials from Rockwool and others). There should be an air gap of 1–2 cm from the upper level of the insulation to the clean floor for ventilation.
Floor installation
Floor installation
If the wooden floor is properly laid, its appearance will delight you with originality. Wood flooring does not harm the environment and human health. Other main advantages are also highlighted:
- the floor surface is easily leveled;
- the ability to provide good thermal insulation properties;
- simple installation that can be done quickly enough;
- saving material resources, compared with other options for arranging floors;
- good sound insulation performance;
- there is a possibility of placing communications under the floor.
For work, you will need the following materials:
- puncher;
- laser or conventional level;
- electric saw;
- drill;
- screwdriver;
- floor boards and logs;
- insulating materials, among which there is necessarily waterproofing, and for living quarters and insulation;
- hardware (anchors, screws, nails).
First, the optimal distance between the lags is calculated, then they are laid on the waterproofing material (film). To make the surface even, be sure to use a level. Anchor bolts are used to attach the bars to the concrete. For the rest of the bases, you can use dowels. To calculate the required length of the bolt, you need to add 6-8 cm to the section of the log.
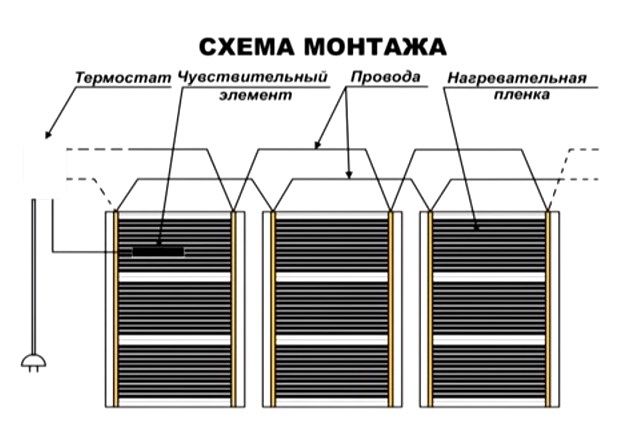
DIY infrared floor heating installation

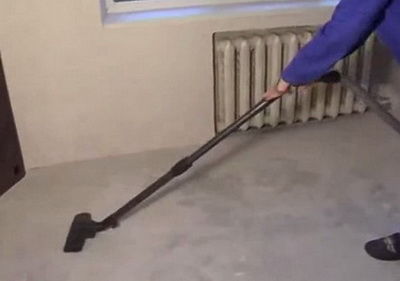
Before laying, be sure to prepare the surface.The surface is cleaned, washed out and checked for horizontal direction. If the level difference reaches 5 mm, it is better to pre-level the base. Then a place is prepared for mounting the thermostat. For this, a strobe is prepared to the place of its installation and a hole is drilled in the wall to place it. From the nearest outlet, hidden wiring is carried out to the place of its location.
In order for the heat not to go down into the ceiling, it is necessary to install thermal insulation. The layer thickness should be approximately 3-5 mm. If the floor is laid on the first floor of a private house, you can additionally lay a layer of waterproofing under the thermal insulation.
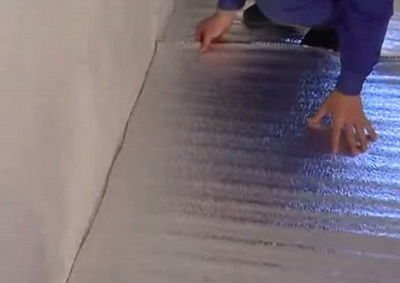
If an IR warm floor is laid under linoleum, you can take penotherm or isolon as a heat insulator, if under a tile, a technical cork is ideal. Thermal insulation materials are held together with special tape.
In the future, paths for laying wires and holes for fasteners are cut in them. Next is the direct installation of an infrared heated floor.
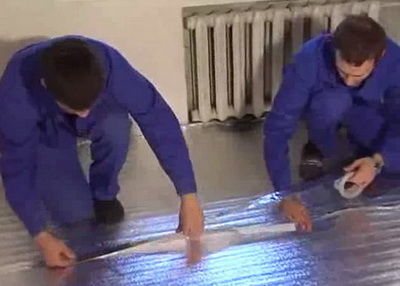
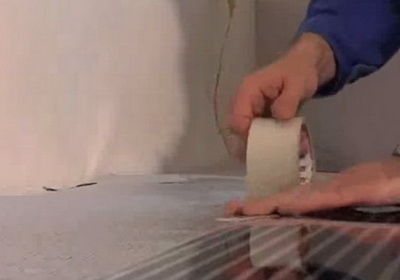
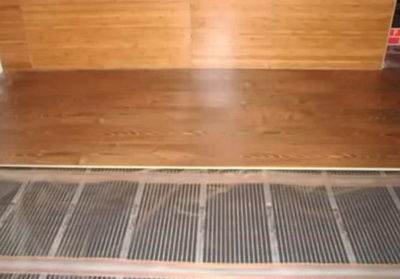
The film is spread with copper heaters downwards, at a distance of 10 - 20 cm from walls and a meter from heat sources, for example, batteries. The film is cut in light places, between dark areas, put end-to-end without overlap and is also fastened together with adhesive tape.

The outer strips are also taped to the insulation mats. Even one person can lay the infrared film warm floor with his own hands.
In places where copper is cut, open areas must be insulated. It is easier to do this with bituminous film insulation. To do this, cut off flaps a little larger than necessary and glue the open areas on 2 sides.
Then the glued areas need to be pressed into the thermal insulation and glued on top with tape. This isolation will be effective even in the event of leaks. Only the areas to which the wires will be mounted should remain on the surface.

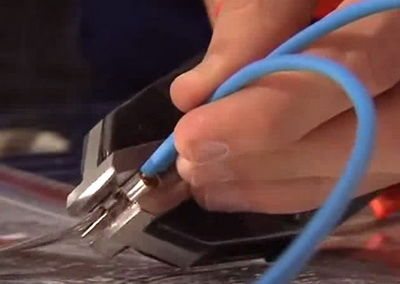
Clamps are attached to the remaining sections of copper.
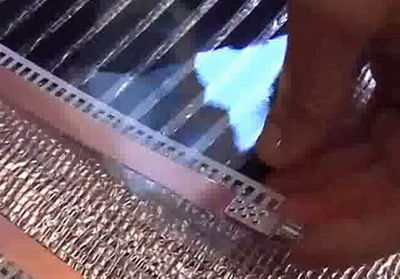
When installing the clamp, do not damage the film, otherwise the floor will soon fail.
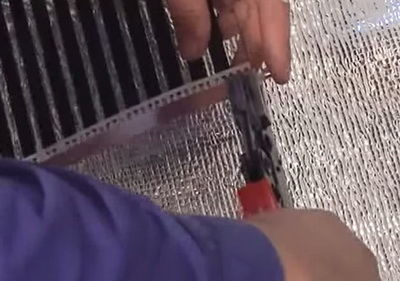
The clamp is inserted under the copper foil and clamped with pliers.
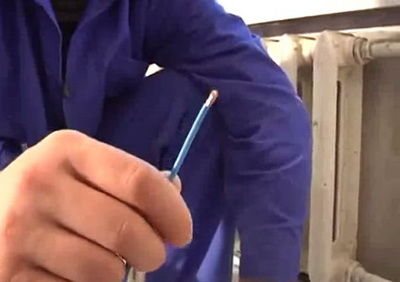
The wires are connected in parallel.
This ensures high-quality operation of the system when one section fails.
The stripped end of the wire is inserted into the hole of the clamp, clamped with pliers.

The joint is also insulated with bitumen insulation and fixed with tape. For more details on how to make an infrared warm floor correctly, see the video.
Through the grooves in the insulation, the wires must go to the wall to the baseboards and from there to the thermostat.

All wires must also be glued with tape. The thermostat sensor is installed in the center of the 2nd section. Under it, a recess is also cut into the base, and under the wire leading to it, a groove.
The thermostat is connected traditionally. The sensor wires are mounted in the contacts on one side, the floor heating wires on the opposite side, and the power supply wires in the central contacts.

The top coat is laid on top. Installation of infrared floor heating is completed.
Finishing cladding
Finishing cladding
The floor of wooden planks is laid from the corner of the room. The first row should adjoin the wall with a gap of 1 cm. This distance is needed to level out possible deformations of the tree under the influence of loads or temperature fluctuations.
The next row is shifted in comparison with the previous one by 2 positions. To make the boards fit as tightly as possible, you need to tap with a small hammer, which is applied to the side of the installed log.
When the boards are fixed to the walls, the fasteners must be placed on top. This will not affect the appearance, because their heads will cover the baseboard. In other cases, the boards are attached only to the bottom of the grooves.The screws along with the caps are placed behind the board, therefore they are successfully masked.
Upon completion of the installation of the boards, you need to install the skirting boards.
Laying boards: tips

Laying boards
- Installation of wooden floors can be started after the installation of all logs, checking their stability and compliance with the level.
- The boards are fixed to the logs, no fastening must be missed, as this can violate the integrity of the coating due to the loosening of the log.
- During installation, you need to place the joints of the boards on the middle part of the log.
- To make the coating as reliable as possible, before fixing the boards with fasteners, tighten them with staples using a construction stapler.
- To avoid the formation of cracks from the fasteners, you need to drill small holes in advance, use a thin drill.
- To mask the cracks, you can put a fillet instead of a baseboard.
- To properly drill the holes for the pipes, you need to calculate their diameter, and then add about a centimeter to it.
Fine finishing
Fine finishing
It is necessary to get rid of irregularities on the floorboards, level the ledges, level differences. You can use a sander. With its help, it is easy to make the floor completely flat by simply walking the device over the entire surface. If you do not have a sander, you can quickly remove any noticeable imperfections with large sandpaper, and then use a fine-grained emery cloth to polish the base.
For the floor, you need to apply a special coating that can increase its resistance to damage. Main varieties:
- grinding;
- impregnation with oil mixed with drying oil;
- leaching with soda (treatment with a solution similar in consistency to ointment);
- parquet varnish;
- painting;
- wax mastic.
When applying impregnation, paint or varnishing, care must be taken to apply the coating in movements that are parallel to the grain of the wood. Then the heterogeneity of the layer formed in the shape of the movements of the roller or brush will be smoothed out.
Following the technologies for arranging a wooden floor on logs will ensure its durability and aesthetic appeal. Compliance with the recommendations for the choice of material and preparation of the base will ensure the reliability of the floor, the work can be done once for many years.
Video - Do-it-yourself installation of a wooden floor on logs
What are lags
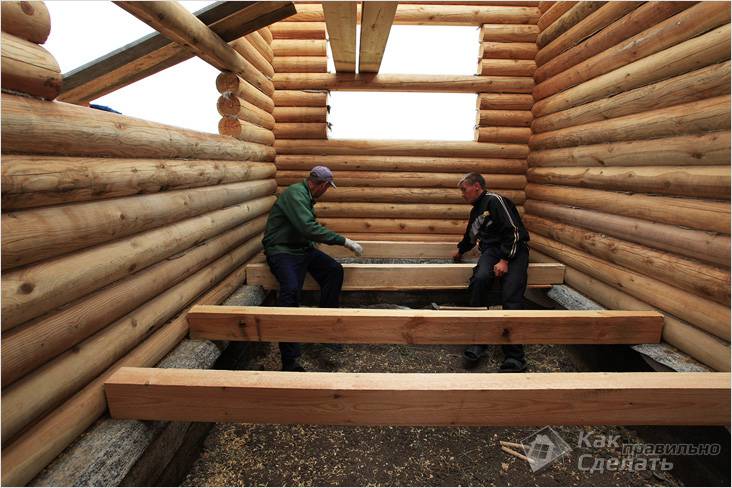
Lags - cross beams that serve as a support for rough and final flooring. They are made from different materials: concrete, polymers, wood. More often than others, beams or thick (50 mm) boards are used, which are placed on the edge.
The popularity of wooden products is due to the low cost of the material. Substandard products that have undergone only primary processing are suitable for lag. Beams and boards are easier, faster to mount. One person can do it. If necessary, damaged logs can be replaced without compromising the integrity of the entire structure.
Attention! In construction (repair), one-piece products are used. You can not make lags from scraps with connections.
When installing wooden floors on logs, different technologies are followed. They can be arranged on any basis. This changes the methodology.
For the normal use of the floor, it is important to create maximum structural stability. Lags are placed at a certain distance from each other. The optimal step is 40-60 cm. With this arrangement, the ribbed base will last a long time, the floors will not bend, do not deform under the weight of a person, home furnishings.