Individual construction is becoming more and more popular. Indeed, who does not dream of doing the construction of all the elements in the house with his own hands, making his own dream come true? The construction process has a lot of subtleties that must be taken into account. So, for example, just one question of choosing a ceiling can be confused for a novice builder.
The ceiling must be rigid as well as durable, and its design depends on the magnitude of the expected load.
In many ways, the choice of the type of ceiling depends on the type of house, the amount that the owner is willing to pay for materials and work, and the technology of installation work.
Requirements

Beam types of floors
Overlapping the ceiling, regardless of what material went into their manufacture, must meet the accepted standards:
- The overlap is obliged to withstand the operational loads calculated by you in advance. The design load includes the weight of the floor beams and the ceiling finish material you choose;
- The rigidity of the structure must withstand all expected loads, while it must not deform;
- It is also necessary to provide the ceiling with sufficient sound and heat insulation characteristics.
- One of the main characteristics of a ceiling slab should be its fire resistance.
There are two types of ceiling slabs: slab and beamed.
DIY ceiling in a wooden house step by step video tutorial
The main / Building a house / Ceiling / Do-it-yourself ceiling in a wooden house step-by-step video guide
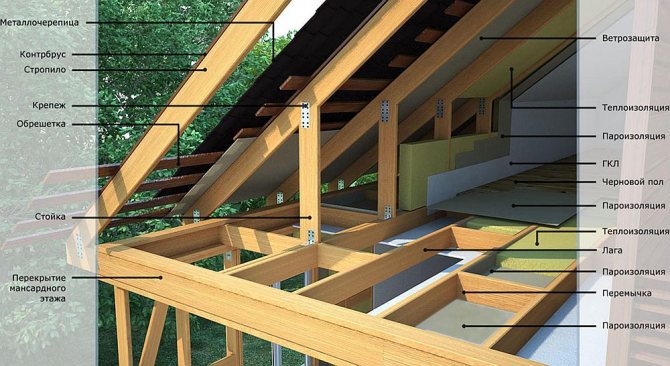
In modern construction, universal environmentally friendly materials play an important role, with the help of which you can easily and quickly build from scratch or on an old reliable foundation. Wood is one of the most human-friendly natural building materials. It has not only scent and health benefits, but also exceptional qualities.

Ceiling decoration in a wooden house
- Under the influence of humidity and a sharp change in temperature, wooden parts of the structure can swell or shrink.
- Changes to the wood are reflected in the framing of the ceiling.
The ceiling in a wooden house can be made from various materials. Regardless of its type, it is first important to focus on the frame base, since the integrity, reliability of the entire structure throughout its service life depends on it.
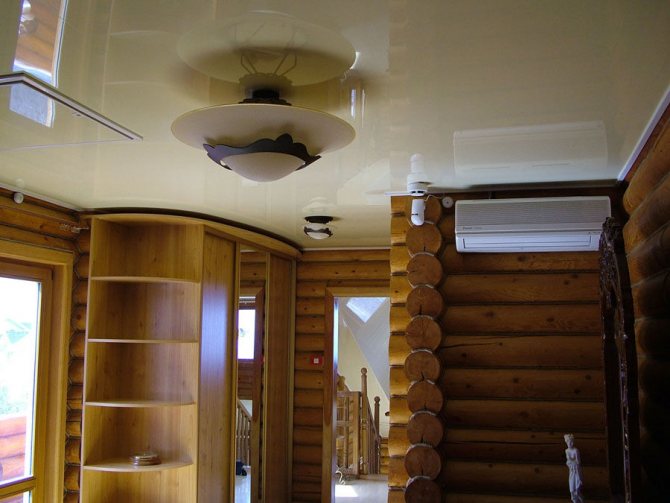
Photo of a stretch ceiling in a wooden house
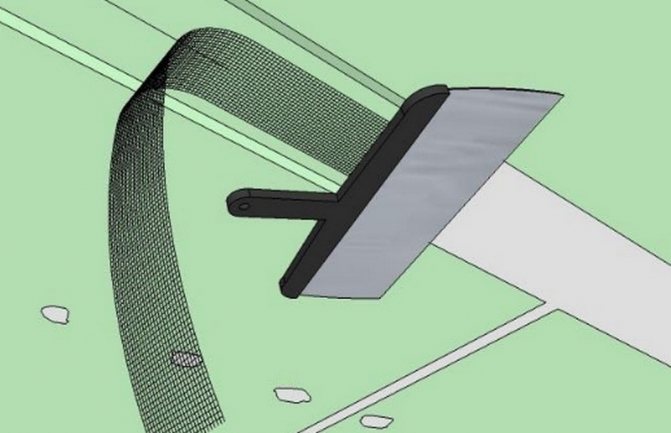
- Before installing the lathing, it is important to waterproof the old wooden ceiling surface of an old residential building or floor beams of a new building made of wood.
Antiseptic for wooden surfaces
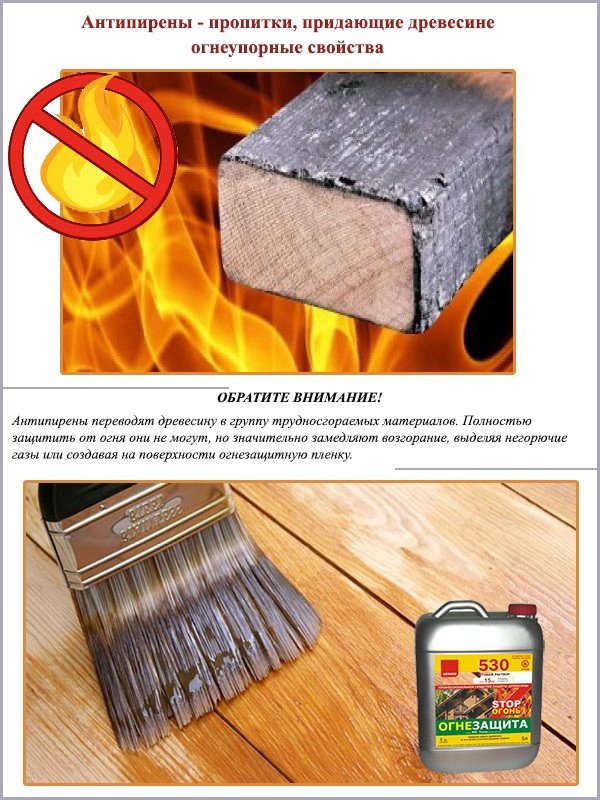
Fire retardants - impregnations for imparting refractory properties
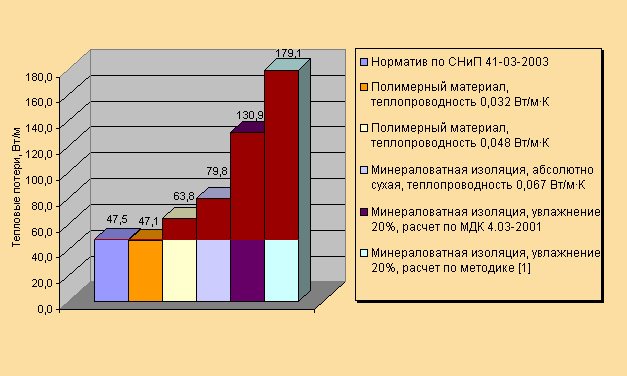
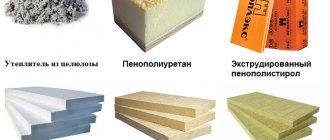
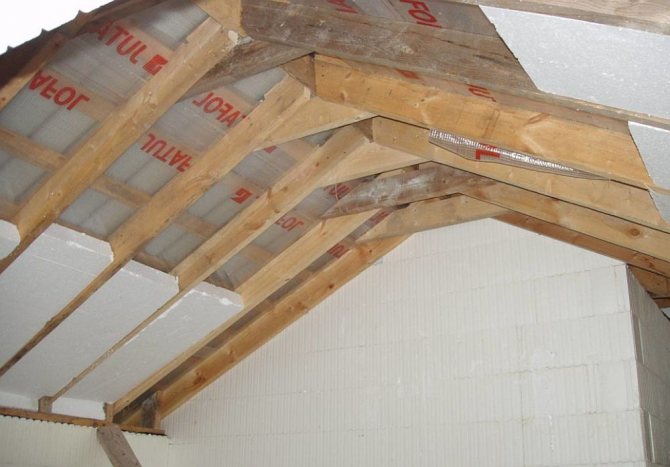
Comparison of specific heat losses for different types of thermal insulation materials
Table. Comparative characteristics of insulation materials for the ceiling
It is important to remember that the frame for the ceiling must have an independent structure that does not tie to the walls. This will help to avoid possible deformations during swelling, drying out of the wood and shrinkage of the building itself.
Option with metal profile crate

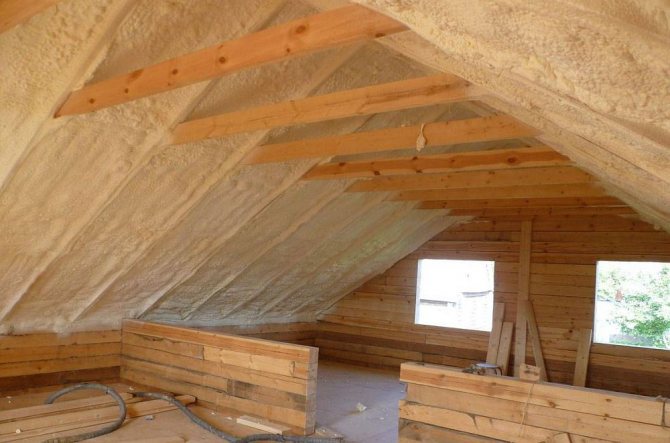
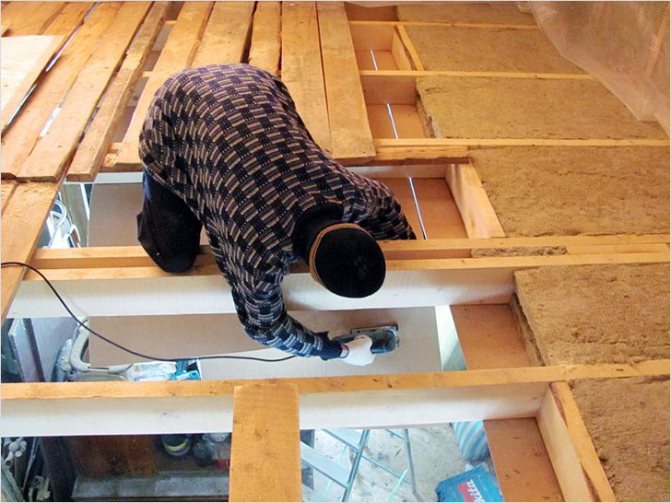
Insulation of the ceiling of a wooden house with mineral wool

With the help of modern building technologies, you can choose different options for finishing the ceiling in a wooden house, in which different materials are used:
- Plaster... With this method, a mesh is stuffed onto a timber joist floor, on which plaster is applied. With the right plaster, a fairly strong and reliable ceiling surface is obtained.
- Drywall... This finish allows the installation of multi-level ceilings of complex configurations that combine different surfaces. In doing so, it is very important to adhere to the technology.
The ceiling in a wooden house with your own hands using gypsum cardboard can be made with the following tools and materials:
- building level;
- scissors for metal;
- tape measure and pencil;
- plasterboard knife;
- drill;
- screwdriver;
- plasterboard sheets;
- metal profile UD, CD;
- anchor dowels;
- dowels for profiles;
- self-tapping screws TN 25;
- suspensions;
- crabs connectors.
- The metal profile is attached perpendicular to the beams. The distance between the ceiling profiles must be 60 cm.
- A guide profile is inserted into the end faces of the ceiling profile. In this case, it is important not to attach it to the wall.
- At the end of the assembly, special crab connectors are also used. Strengthening the structure with additional jumpers between the profiles is achieved with the help of such fasteners.
Plasterboard ceiling in a house from a bar must be mounted, adhering to certain rules:
- it is better to stack sheets in a checkerboard pattern;
- the edge of each sheet of gypsum board should be "superimposed" on the middle of the ceiling profile;
- for fasteners, you can use a screwdriver and self-tapping screws TN 25, which are recommended to be screwed in in increments of 15 cm. This will allow you to securely attach the gypsum board sheets to the frame base;
- the screw head should not enter the plasterboard surface deeper than 1-2 mm.
We make ceiling tiles. We fasten the sheet as in the figure, stepping back 2 mm from the walls
Cut edges adjacent to the wall also need to be cut
We fasten the sheets with a shift of 1250 mm + 2-3 mm per gap
The same technological gap of 2 mm between sheets
Following this principle, we install the remaining sheets
Scheme of sealing the attached sheets of drywall to the ceiling
After finishing the installation of the ceiling, you must do the following:
- increase the joint gap up to 5 mm at an angle of 45 degrees;
- fill this gap with an elastic filler;
- apply reinforcing tape on top and cover it with a layer of putty;
- after drying, clean the seams;
- at the next stage, you can start painting;
- after the installation of electric lights and the paint has dried, the ceiling decoration in the wooden house is completed.
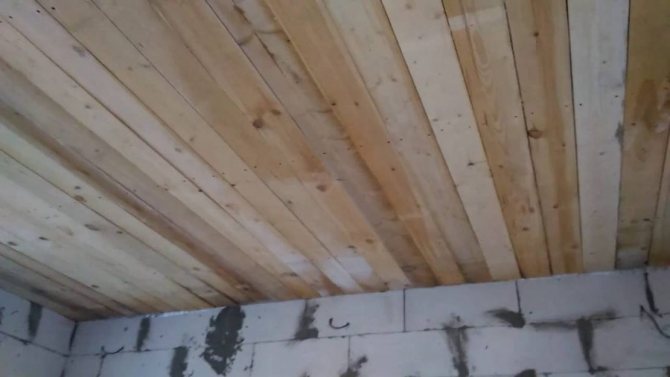
- Wooden lining... Wood materials fit better and more harmoniously into the structure of a wooden house. Lining is a specially processed board with a groove and tongue. This design is easy and quick to assemble. It is "mobile", "breathes", is characterized by strength, durability, good sound absorption, and also perfectly retains heat. The installation of such structures is carried out sequentially, taking into account the characteristics of the wood. For the frame, you can use wooden blocks with a section of 30 by 40 mm, which are attached perpendicular to the beams.
- Veneered panels... These modern materials imitate precious woods and have an attractive, rich appearance. Locking connections will allow you to easily and quickly install on your own.
- Solid wood ceilings... An expensive but beautiful natural option that is reliable and durable. It is easy to mount by attaching it to the rough surface of the old ceiling.
- Complex finishing... In this version, wooden beams are used in combination with gypsum cardboard, plastic panels.
- Stretch ceiling very well suited for new timber houses, as such structures shrink for a long time.
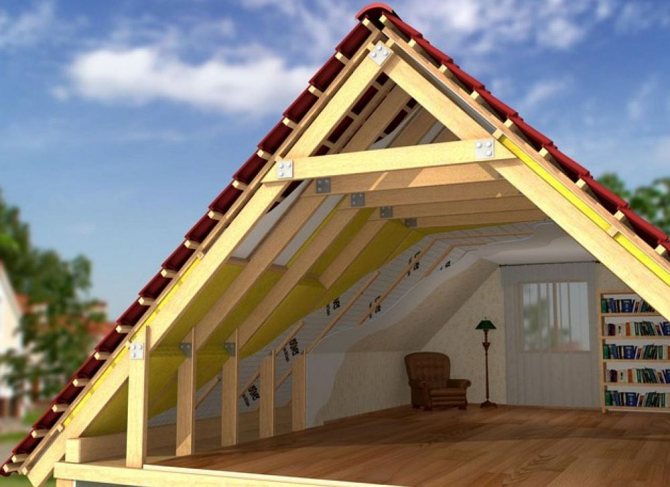
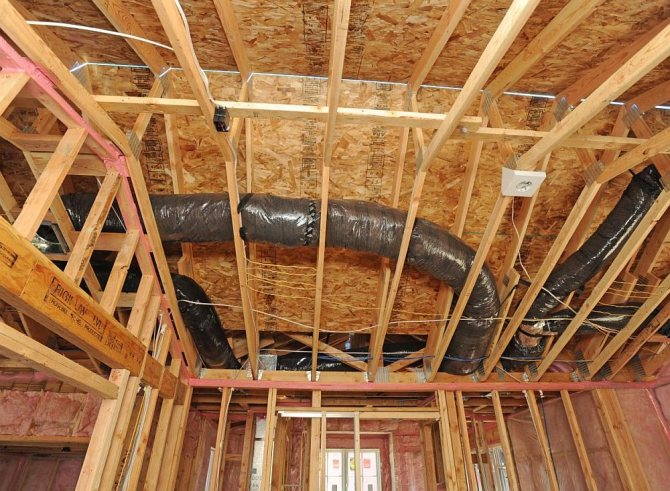
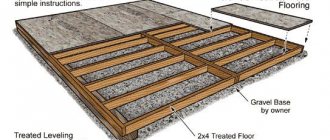
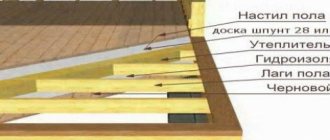
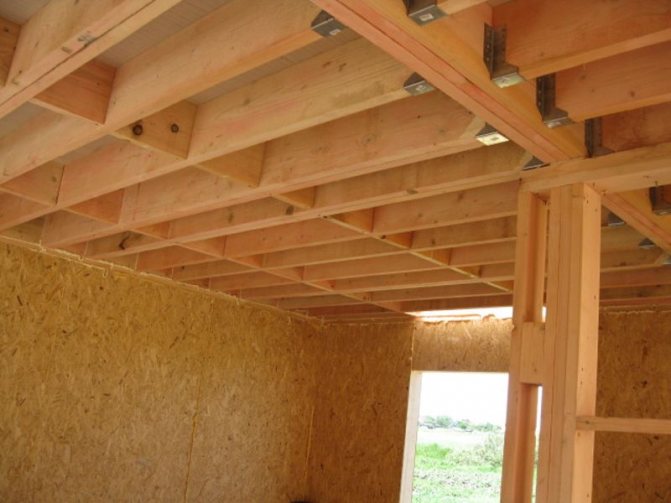
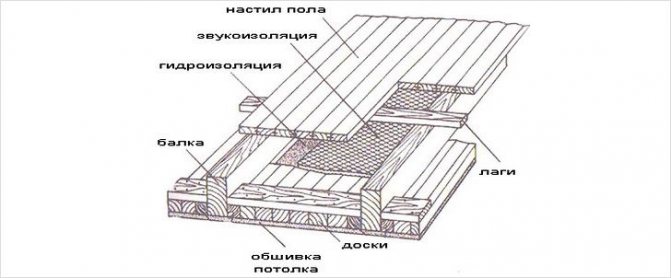
Beam floor

Beam processing
This type of flooring is very popular for individual construction. When building your home, become familiar with the method of constructing timber joists.
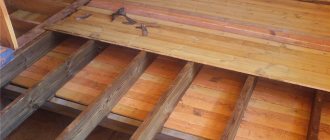
Wooden beams, supported by the load-bearing walls of the building, form the basis of the beam floor. Calculate their cross section depending on the length of the step between them and the distance between the load-bearing walls, overlapped by the beams and, of course, on the expected load on the ceiling.

Leaning beams on a wooden purlin
Take seriously your choice of timber for your joists. When constructing a ceiling, remember that beams can be made from different types of trees. The main thing is that they are well dried for 100 days. This largely determines their quality. Check the beams before starting the construction of the floor. Check for rot, cracks or other wood disturbances. Do not use rejected beams in construction.
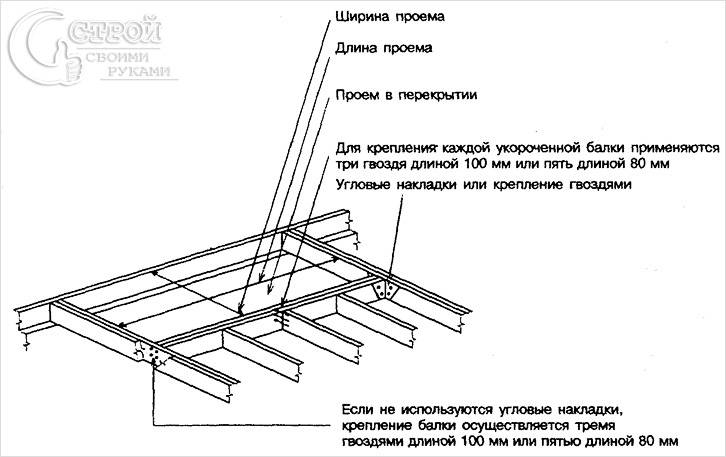
Floor opening scheme
- Place the beams on the walls and align them flat. Do this with tar board liners of varying thicknesses. Never use wedges made from untreated wood for this job.
- To reinforce the joints of the beams on the inner walls, secure them with metal brackets and clamps. Instead, you can use wooden strips made from planks at least 40 mm thick.
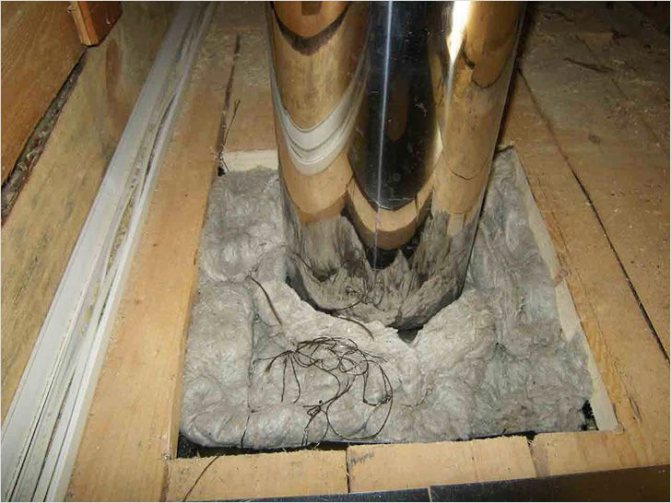
- According to fire safety rules, floor beams must not be placed closer than 400 mm to the chimney.
- Be sure to treat the ends of the beams that are embedded in the load-bearing walls with an antiseptic, tar and wrap with roofing material. These measures will protect the timber beams from the occurrence and development of rot.
- To stiffen the floor, fasten each second beam to a metal fastener embedded in the masonry.
- To make a rough ceiling, prepare the skull bars, then attach them to the side edges of the beams. Attach the material of your choice to the bars, forming a rough ceiling.


Preparing for installation
Mainly, this operation consists in aligning the footprints for the beams. With the help of measuring instruments, a level, a tape measure and a cord, the plane of the upcoming overlap is determined. There are two main methods of installation, although the design of the ceiling does not fundamentally change from this. In the first case, resinous wooden spacers are installed over the upper cut of the wall, leveling the plane. The operation is simple and not laborious. Subsequently, the gaps between the beams are laid with a material similar to that used in the construction of the wall. For installation according to the second method, seats are made. According to the markings, openings are cut into which the floor elements are then laid. Ideally, these are grooves that repeat the shape of the timber in the lower part, coinciding with the level of the future ceiling.
The wooden structural elements themselves do not need special preparation. The only mandatory requirement is beveled ends.
Also see - How to properly insulate a frame house
Slab overlaps

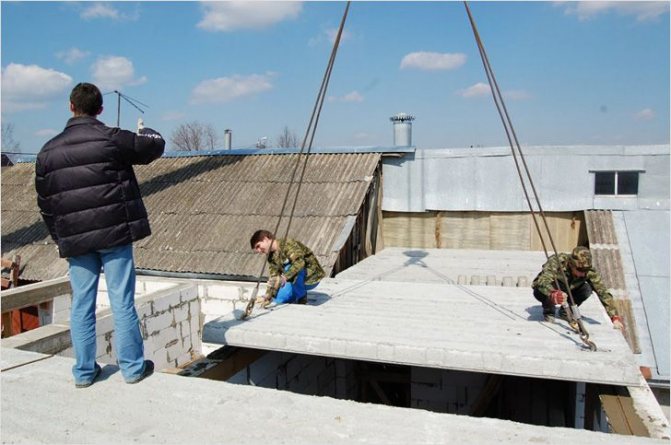
Laying floor slabs
Basically, slabs are used in the construction of apartment buildings.
When building your own houses, this type of flooring is less in demand. Plates are characterized by a large dead weight, which means that when installing them, the use of special equipment will be required, and this is associated with an increase in cash costs.
Note!
Slabs have an undeniable advantage. They do not burn, are characterized by high strength and durability.
If you have installed a slab floor according to the existing rules, you will end up with a flat ceiling surface that does not require additional leveling and grinding.
For the manufacture of slabs, heavy and lightweight concrete is used; they can be solid or hollow inside.
Note!
When building a private house, it is better to use hollow core slabs. They are characterized by excellent heat and sound insulation parameters. In addition, their weight is much less.
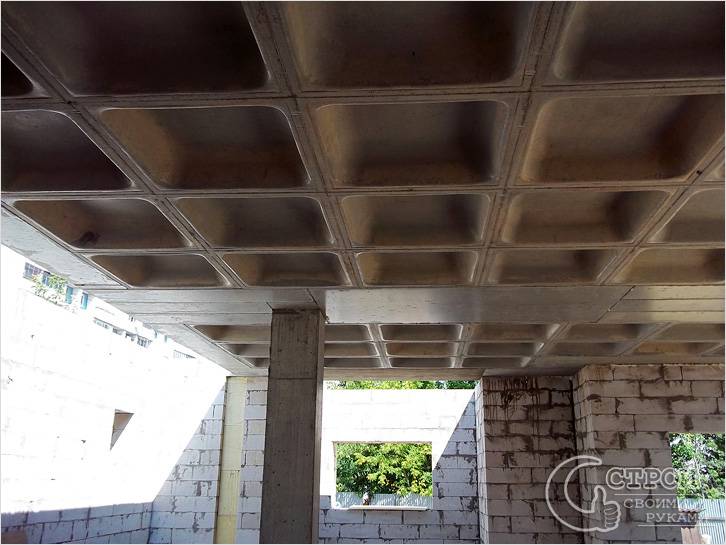
Ribbed overlap
There are two types of slab slabs: monolithic and prefabricated.
When installing slabs, they are laid on the load-bearing walls of the building, for greater reliability of the structure, erected with a thickness of at least 150 mm. Bearing walls should be 3 m apart. If it exceeds this value, then you will have to mount a crossbeam, this will make your construction more expensive.

Prefabricated monolithic
When starting the construction of a private house, you must determine exactly which ceiling ceiling - slab or beam - is most suitable in your particular case. Remember that the final result is greatly influenced by the quality of the materials used and the observance of all technological requirements for the installation of floors. If you do everything right, you will end up with the expected result.
What may be required
To install the ceiling ceiling with your own hands in a private house, you will need the following materials and tools:

Tools for installing ceiling slabs.
- building level;
- timber;
- roofing material;
- antiseptic for wood;
- self-tapping screws;
- polyethylene film;
- Scotch;
- electric planer;
- boards;
- vapor barrier film;
- insulating material;
- sand;
- sawdust;
- lining;
- construction stapler.
The system for creating a ceiling is in many ways similar to the technology of arranging a floor covering. It is best to harvest larch or pine timber.